Summer is the perfect time to enjoy delicious Oreo milkshakes. In this tutorial, we’ll show you how to make an Oreo milkshake in a Ninja blender. It’s easy and only requires a few simple steps. So, gather your ingredients and let’s get started!

How To Make Oreo Milkshake In A Ninja Blender
Making an Oreo milkshake in a Ninja blender is a simple and delicious treat. Here’s a step-by-step guide on how to do it:
Ingredients
- 4-5 Oreo cookies
- 2 cups of vanilla ice cream
- 1 cup of milk (adjust for desired thickness)
- Optional: whipped cream, extra Oreo cookies for garnish
Instructions
- Prep the Ingredients
- Begin by unwrapping the Oreo cookies and separating them into halves. You’ll be using both the cookie and the cream filling in the milkshake.
- Add Ice Cream
- Place 2 cups of vanilla ice cream into the Ninja blender. Make sure the ice cream is slightly softened for easier blending.
- Add Milk
- Pour in 1 cup of milk. The amount of milk can be adjusted based on your preference for thickness. If you like a thicker milkshake, use less milk; for a thinner consistency, add more milk.
- Add Oreo Cookies
- Break the Oreo cookie halves into smaller pieces and add them to the blender. You can also crush the cookies before adding them if you prefer a smoother texture.
- Blend
- Put the lid on the blender securely. Start blending on low speed, gradually increasing to higher speeds as the ingredients begin to mix. Blend until the mixture is smooth and the Oreo cookies are fully incorporated.
- Check Consistency
- Pause the blender and check the consistency of the milkshake. If it’s too thick, you can add a bit more milk and blend again until you reach your desired consistency.
- Taste and Adjust
- If you’d like a stronger Oreo flavor, you can add an extra cookie or two at this point. Blend briefly to mix them in.
- Serve
- Once you’re satisfied with the consistency and taste of the milkshake, turn off the blender. Carefully remove the lid.
- Pour and Garnish
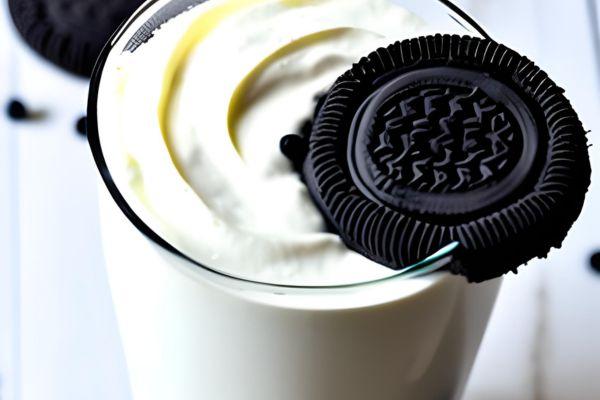
- Pour the Oreo milkshake into glasses. If desired, top each milkshake with a dollop of whipped cream and crumbled Oreo cookie pieces for garnish.
- Enjoy
- Serve the milkshakes immediately while they’re still cold and refreshing. Use a straw or a spoon to enjoy every creamy and cookie-filled sip!
Remember that the proportions can be adjusted to suit your taste preferences, whether you like your milkshake creamier, thicker, or with more Oreo flavor. Experiment and have fun creating your perfect Oreo milkshake using your Ninja blender!
Recipe Variations
- Chocolate Oreo Milkshake
- Add a tablespoon of chocolate syrup or cocoa powder to the blender for an extra chocolatey twist.
- Mint Oreo Milkshake
- Add a few drops of mint extract or a handful of fresh mint leaves to the blender for a refreshing mint flavor. You can also use mint chocolate chip ice cream.
- Peanut Butter Oreo Milkshake
- Add a spoonful of peanut butter to the blender for a creamy and nutty taste. Peanut butter lovers will enjoy this combination.
- Double Stuffed Oreo Milkshake
- Use double-stuffed Oreo cookies for an even richer and creamier milkshake.
- Coffee Oreo Milkshake
- Add a shot of espresso or a teaspoon of instant coffee to the blender for a coffee-infused Oreo milkshake.
- Caramel Oreo Milkshake
- Drizzle caramel sauce into the blender and swirl it around before blending for a sweet caramel flavor.
- Vegan Oreo Milkshake
- Use dairy-free ice cream and plant-based milk alternatives like almond milk, coconut milk, or oat milk to make a vegan version.
- Protein-Packed Oreo Milkshake
- Add a scoop of your favorite protein powder to give your milkshake a nutritional boost.
- Fruity Oreo Milkshake
- Add fresh or frozen berries, banana slices, or other fruits to the blender for a fruity twist.
- Nutella Oreo Milkshake
- Add a spoonful of Nutella to the blender along with the Oreo cookies for a hazelnut-chocolate delight.
Remember, the key to creating your perfect Oreo milkshake is to experiment and have fun with different ingredients. Feel free to combine multiple variations or come up with your own unique twists. Enjoy your delicious and customizable Oreo milkshakes!
Which Is The Best Ninja Blender For Oreo Milkshakes?
Now that you know how to make an Oreo milkshake in a Ninja blender, you might be wondering which model is the best for the job. While any Ninja blender will do, we recommend the Ninja Professional Blender. It’s specifically designed for making smooth and creamy milkshakes. Plus, it comes with a large 72 ounce pitcher – perfect for serving multiple people.
So, there you have it! Our complete guide on how to make an Oreo milkshake in a Ninja blender. Be sure to follow the recipe above and check out our other delicious milkshake recipes. Thanks for reading and happy blending!
Tips For The Perfect Oreo Milkshake Every Time

Here are some tips to ensure you create the perfect Oreo milkshake every time:
- Use Quality Ingredients
- Use good-quality ice cream, fresh milk, and genuine Oreo cookies for the best flavor and texture.
- Prep Ingredients Ahead
- Allow the ice cream to soften slightly before blending. This makes it easier to blend and ensures a smoother consistency.
- Start Slow
- When blending, start on a low speed and gradually increase it. This helps prevent splattering and ensures even blending.
- Control Thickness
- Adjust the amount of milk to control the thickness of the milkshake. Less milk will make it thicker, while more milk will make it thinner.
- Add Mix-Ins Thoughtfully
- If you’re adding extras like chocolate chips, nuts, or fruits, consider the overall flavor profile and texture. Make sure they complement the Oreo flavor.
- Avoid Overblending
- Blend just until everything is well combined. Overblending can lead to a thinner consistency and possibly over-warming the ice cream.
- Crush the Oreos
- Breaking the Oreo cookies into smaller pieces before blending helps prevent large chunks from being left in the milkshake.
- Chill Glasses
- Place your serving glasses in the freezer for a few minutes before pouring in the milkshake. This keeps the milkshake colder for longer.
- Garnish Creatively
- Experiment with whipped cream, chocolate drizzles, crushed Oreos, or even a maraschino cherry for a visually appealing presentation.
- Serve Immediately
- Milkshakes are best enjoyed fresh. Serve them as soon as they’re ready to maintain the ideal temperature and consistency.
- Experiment and Adapt
- Don’t be afraid to modify the recipe to match your preferences. Add more cookies for a stronger Oreo taste, adjust sweetness levels, or try different ice cream flavors.
- Clean the Blender Promptly
- After enjoying your milkshake, clean the blender promptly to prevent any ingredients from drying and sticking, making cleanup easier.
- Share and Enjoy
- Milkshakes are a delightful treat meant to be shared. Enjoy them with friends and family for a memorable experience.
Remember, making the perfect milkshake is about finding the balance that suits your taste buds. Feel free to adjust the ratios and ingredients until you discover your favorite version of the Oreo milkshake!
Final Verdict – How To Make Oreo Milkshake In A Ninja Blender
Making an Oreo milkshake in a Ninja blender is easy and only takes a few minutes. Simply add heavy cream, sugar, vanilla extract, and Oreos to the blender and blend until smooth.
If you want a thicker shake, add more heavy cream. For a thinner shake, add more milk. You can also add ice cream to the mix for a richer flavor.
Enjoy your Oreo milkshake immediately or store it in the fridge for later.

