Do you ever get tired of buying flour?
It can be expensive, and it can take up so much room in the pantry.
This is why many people are turning to grind their own wheat berries to make flour.
But can you grind flour in a blender?
If you have ever tried grinding wheat berries before but were unsuccessful because the result was more coarse than powdered, then this article can help!
We will show you everything that’s needed for getting the perfect texture when making your own flour from scratch at home.
It can be done by spending less money on store-bought ingredients while still achieving high-quality results every time.
Can You Grind Flour In A Blender?
If there is one thing that can be said for blenders, it’s their versatility.
They can handle so many different types of ingredients with ease and efficiency which makes them great time savers when cooking.
However, if you are trying to make your own flours at home then the question will arise: can I use my blender? The answer may surprise some people but they can indeed be used as long as a few adjustments are made first.
One way to ensure success is by purchasing whole grains instead of pre-ground ones from the store because these have less chance of being processed too much already making them more suitable for grinding in the blender or food processor afterward.
If this isn’t an option though, another way is to make sure the blender or processor has a really powerful motor because not all can handle pulverizing grains.
Here are the best blenders for grains.
Why Should You Grind Your Own Grains?
There can be many reasons why someone might want to grind their own grains.
One of the most popular is saving money because they can buy whole grains for less than what it would cost them if they bought pre-ground ones from the store, and then make flour out of those at home instead.
Another reason people may turn to grind their own grain is that some people don’t like all the additives in commercially prepped flours such as bleached wheat flour or other preservatives added to extend shelf life.
These can end up in the food that you make and feel terrible after eating it.
Grinding your own grains can also help to cut down on waste because often people will throw away their whole wheat berries when they can’t find a use for them or just forget about them even though there is still plenty of life left in those little seeds!
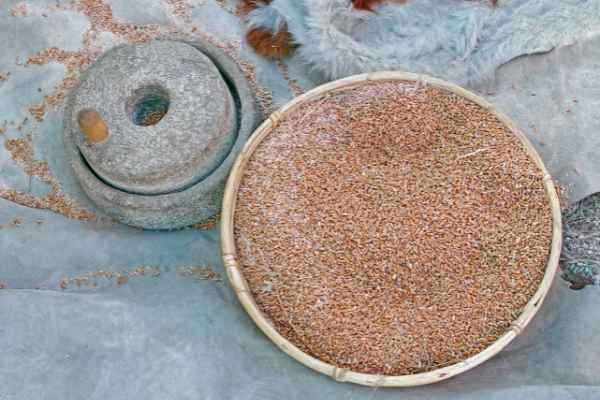
Making Your Own Flour In A Blender
To start out, one of the first things you’ll need is a blender.
You want this to be powerful enough so as not to pulverize your grains into the flour before breaking any of the molecules apart which can happen with weaker ones if too much time passes by between grinding.
You can use a food processor too, but it may take longer to get the desired consistency in that case than with using a blender or you can just pulse it while turning up the speed until the flour reaches your desired texture.
Once you have this setup, start by washing and drying a cup of whole wheat berries thoroughly because they will be much easier to work with when dry as opposed to wet which could result in any liquid spilling out onto surfaces if left unattended.
You can also mix them around inside of their container before opening so that all clumps are broken apart beforehand!
Next is choosing where on the grain you want to grind – either somewhere near one end or closer towards the middle so that both ends come off at the same time.
This can take some practice and trial-and-error so don’t be discouraged if it takes more than one try to get a hang of it!
The key is that you want to have your hand at least halfway up on the outside of the grain while holding onto both ends as this should prevent too much crushing which can happen when trying to hold either end with just one arm.
Next, start twisting or turning back and forth quickly and steadily until they break into pieces small enough for your liking; keep those hands high about halfway because otherwise there will be a lot of over-grinding happening which can turn them into powder instead of flour!
For whole wheat berries, an ideal texture would look like fresh snow (as opposed to something more like sawdust), but with some of the kernels still visible.
This can be an easy way to save money without really feeling that much difference in flavor or texture when using homemade over store-bought!
Tips On How To Store Ground Grains
Be sure to purchase high-quality, whole wheat goods from a reputable store.
When grinding at home, be sure that there are no hard pieces within the entire batch.
Do not microwave or fry in oils that can turn rancid.
Store it in an airtight container for up to six months and freeze for 18months+.
Use heatproof containers such as glass Tupperware to avoid contamination of grain with harmful chemicals from plastics which produce toxic and allergic reactions in some people.
Label before packing and include all necessary information – name, date packed, storage instructions, and expiry date if you plan on storing longer than six months.
Store grain in a cool dark place away from light exposure such as stovetop or oven areas where it can be exposed to heat.
Recipes That Use Ground Grains In Them
Most can be made using a blender or food processor, but can also include some recipes for baking that call for ground oats.
Chocolate Banana Bread Recipe
Ingredients
- Wheat germ
- Peanut butter
- Cocoa powder
- Bananas
Combine the wheat germ and peanut butter in a small bowl to form crumbs with your fingers before adding cocoa powder and bananas.
Mix well until blended together while being careful not to overdo it so as to still have chunks of banana visible throughout.
Pour into a loaf pan lined with parchment paper and bake at 350°F/ 175°C for 50 minutes (or 55 if you like them moister).
Place on rack immediately after removing from oven when done cooking. Let cool completely before slicing into pieces.
After-School Snack Recipe
Ingredients
- Wheat germ
- Honey
- Milk (or other dairy product)
Combine the wheat germ and honey in a microwaveable container with milk before heating for one minute on high power using a canning jar or Tupperware that can hold heat well without spilling.
Stir well until mixture is blended together, then let cool to room temperature before serving!
You can also omit the honey if you’re not feeling it sweet enough already.
This can be served as an after-school snack because of its health benefits such as its protein content which will help prevent children from overeating later at home when they don’t get what their bodies need during those hours between breakfast time and dinner.
Pretzel Recipe
Ingredients
- Wheat germ
- Salt-water (or can use milk or orange juice)
Combine the wheat germ and salt in a bowl before adding water, stirring to combine ingredients well while being careful not to overdo it so as to still have chunks of pretzels visible throughout.
You can also try this recipe with other liquids such as milk or orange juice!
After mixing your liquid into the dry mixture, knead for five minutes until the dough is soft yet holds its shape without too much sticking together where you can’t break off small bits easily anymore on your fingers.
Let rest at least thirty minutes before shaping and rolling out thinner than usual because these would be baking twice instead of just once.
Roll dough into long ropes and form the desired shape before baking at 450°F/ 230°C for ten minutes, flipping halfway through cook time to ensure even browning on both sides of pretzels.
Conclusion
Have you ever wondered how to grind grains in a blender?
It’s actually not that difficult.
We’ve provided some easy recipes using ground grains along with tips on storing them and when they go bad.
If you have any questions, please mention them in the comments section below!