The kitchen is the heart of any home. It’s where we do everything from making dinner for our families to preparing food for guests and friends, from hosting a party to fixing breakfast in the morning.
But when it comes to appliances, most people have just one or two that they use all the time – a blender being one of them. So knowing how to put a blender together might come in handy!
In this article, I’ll tell you what tools you need and how many steps there are to put a blender together so that your next smoothie can be enjoyed ASAP!
What Are The Parts Of A Blender?
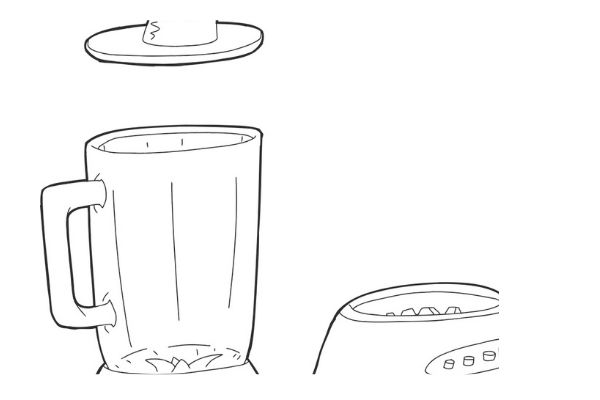
The first part of putting a blender together is to see what the different parts actually are.
There will be a motor base, a glass jar, a lid with blades, a rubber ring, and a handle. Making your smoothie has never been easier!
Read: How Does A Blender Work Step By Step
Tools Needed To Put A Blender Together
In order to make a smoothie you’ll need a few tools – but nothing too complicated or stepped up like in many cases with other appliances. Those tools include:
- Flat Ended Spatula (for removing any debris in the jar)
- Channel Locks Or Adjustable Wrench (for putting the jar on to the base)
- Phillips, Flat Ended or Star Screwdriver (for tightening the jar to the base)
All of these items can be found at your local store.
How To Put A Blender Together
In order to put a blender together you’ll need to follow these steps:
1. Preparing The Lid, Blades And Jar
The first step is to prepare the blades and jar. You need to make sure that there are no rigid objects like paperclips or other debris in the jar, as well as making sure that there are no imperfections on the jar (dents, scratches, etc).
To do this you can use either a flat-ended spatula or your fingers. To use your fingers just be careful not to touch any of the sharp parts.
2. Attaching The Jar To The Base
After preparing the blades and jar it’s time to attach them!
First, place the lid upside down with all five blades facing away from you so they aren’t touching anything.
Put it directly over the base so that they match up exactly – which also means that the blades will be touching the base.
Then place your hand on top of the jar and hold it down firmly as you attach it to the base.
This might take a bit of work, but with a little perseverance, you’ll have it! To tighten it all you need to do is turn the jar clockwise a quarter turn – make sure not to over-tighten or else you can break the jar.
3. Attach The Rubber Ring
The next step in putting a blender together is attaching what’s called a rubber ring or sealer which goes at the bottom between where your jar meets up with your motor base.
There should already be one attached, but if there isn’t needs to go on before you screw on your lid.
To attach it simply place it over the base and put the jar on top of it and turn a quarter turn clockwise – do not try to tighten too much or you may break the rubber ring!
4. Attach The Blades
The final part of putting a blender together is screwing on the blades. This should be as straightforward as it gets, all you need to do is line up the blades and screw them clockwise into the jar.
The rubber ring should hold them in place so you don’t have to tighten too much – but just enough so they don’t come flying out!
5. Plug-In And Your Blender Is Ready To Use!
Once you’ve put your blender together and screwed everything in securely simply plug it in and get blending!
The first thing you’re going to want to try is a smoothie with fresh fruit, yogurt, and ice for an awesome summertime treat.
Now that everything has been explained what are you waiting for? Go make yourself a delicious smoothie!
Tips On How To Put Together A Blender
Here are some helpful tips I’ve found about how to put a blender together:
- Make sure all parts are properly attached before using your machine for the first time.
- Place items in the bottom 1/3 of the jar before turning the unit on, so the contents don’t splash out.
- Use all ingredients at room temperature for the best results.
- Always read the blender manual for specific instructions.
Frequently Asked Questions
To put the blade in a blender, place the blade in the center of the blender with the blunt side facing the bottom of the blender. Line up blade to have four points on the inside base area. With a twisting motion, push the blade firmly into place until it stops going in any further.
The rubber ring goes on the bottom of your blender before you put it on top of the lid. Once it’s been placed properly, then you screw on the blade and tighten them together.
The base is the main part of the blender that’s made of one solid piece. It provides counter space for placing your blender and keeps it from taking up more room on your counters.
Blenders seal with a rubber ring and/or gasket. They keep the ingredients in your blender and prevent them from leaking out of the bottom or sides.
The top is called the jar. It’s where you place all of your ingredients for blending. Sometimes it’s made of glass, but most are now made with plastic or stainless steel.
It’s best to put the liquids in first because they mix together. Then you can add things like ice, vegetables, and fruits.
The gasket is what keeps your blender sealed so it doesn’t leak out. The rubber ring, also known as the gasket, goes between the jar and base.
To put on a blender lid, place it onto your jar with the plastic/hollow side facing toward you. Turn the lid clockwise until you hear it click into place. If there isn’t a click sound then just give it another twist or two to tighten.
How To Disassemble A Blender
If at any point along your journey of using your blender, something goes wrong or you wish to store it away for some time; then chances are you’re going to need to disassemble it.
The first thing I would recommend is turning it off completely (if it isn’t already).
To start take everything that was listed above in the article about putting together a blender and unplugging it from the power source. Then take your jar and remove it from the base and place it on a countertop.
Next, take the blades and unscrew them by twisting them in an anti-clockwise direction.
As you do so, keep hold of any rubber rings or seals that may come loose as they will not fit back together without them!
Finally, carefully take out any rubber gaskets still attached to the bottom of either the blades or jar and discard them.
Put all components away neatly in a safe place where insects won’t be able to get into them (which can damage parts) – preferably an airtight container.
How To Put A Blender Together – Answer
I hope you liked this article about blender jar assembling. Thanks for reading!
I hope this article is able to help anyone who has an issue putting together their appliance or just wants to know more about them.
If you have any questions, then please feel free to comment them below and I will get back to you as soon as possible.
Until next time…happy eating!