
We all love Ninja blenders.
They are very powerful and can be a great addition to your kitchen.
However, they can be a nightmare to clean.
They need proper care in order to maintain their efficiency and safeguard the health of your family.
The best way to clean a Ninja blender is by washing it after each use.
This will help you save money on electricity bills as well since it will not have time to build up any residue inside the machine.
If you want to keep your blender in good condition for as long as possible then you have to learn how to properly take care of it and keep it running.
Keep reading if you want more information about how to clean Ninja blender so that it stays efficient and safe for years!
Is It Important To Clean A Ninja Blender Regularly?
Yes, it is important to clean your Ninja blender regularly.
If you don’t, the food particles that accumulate in the jar will start smelling bad and may even become hazardous since bacteria can grow on unclean surfaces.
This is especially true with moist food particles because they are ideal breeding grounds for all sorts of harmful microorganisms which you definitely do not want in contact with your food the next time you use it!
Are Ninja Blenders Easy To Clean?
Yes, ninja blenders are easy to clean.
Some people think it’s difficult because they consider the blades sharp and tough to reach but it is actually very simple once you know how to.
Cleaning these kitchen appliances is pretty much the same thing as cleaning any other blender or mixer so if you’ve ever cleaned one before, then there’s no reason why you can’t clean this one too!
Ninja Self Cleaning Blender
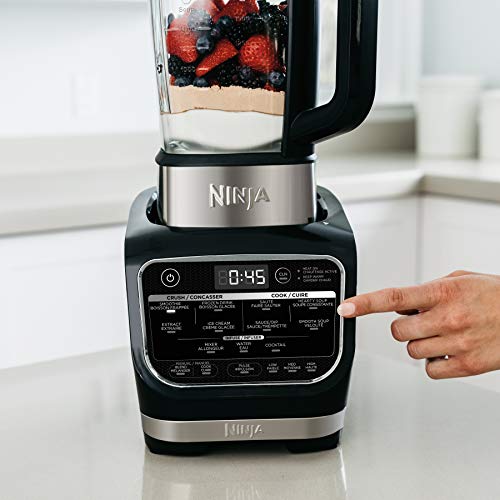
Luckily, there are some blenders that already have cleaning cycles programmed into them that allow the blender to do most of the work for you!
However, don’t worry if your blender doesn’t come with this feature.
You’re still able to let the blender do most of the hard work by following these simple steps.
Step 1: Add a cup of water and two drops of dishwashing liquid to your blender container.
Step 2: Put on the lid and press blend until it starts spinning on its own (about 30 seconds).
Step 3: Remove from the base and rinse thoroughly.
Are The Ninja Blender Parts Dishwasher Safe?
Ninja blenders are dishwasher safe if you own a Ninja Kitchen System or Personal Blender, but it is not recommended.
The constant high water temperature and caustic detergent found in dishwashers break down the plastic components of many kitchen appliances including Ninja blenders.
The company recommends washing them by hand which is pretty simple to do anyway.
It would be more time-consuming to set up your dishes for a cycle then wait for them to come out clean before putting them away than just doing it by hand so it’s really not necessary unless large amounts of food particles have accumulated on the machine itself.
How To Clean Ninja Blender In Dishwasher?
If you want to clean your blender as fast as possible, then placing it in your dishwasher is an option worth exploring.
Place The Blades In The Middle Of A Soapy Dishwasher Load
It’s best to place the blades in the middle of a dishwasher load as opposed to the top rack since they could potentially catch on to other dishes and cause damage.
Make Sure To Remove Any Plastic Elements First
You’ll need to make sure that you remove any plastic elements first before placing them into your dishwasher, especially if those parts are detachable.
Run The Cycle Once As Normal Then Again With No Detergent For Best Results
First, run your dishwasher cycle once as normal and allow everything inside to get nice and clean just like usual.
Then refill the machine with water but don’t add any detergent.
However, there are a few downsides that you may not like which include: the chance that the machine won’t work properly once everything has dried out; possible damage from various dishwashing detergents; and the fact that too much heat can cause damage over time.
The main thing you should keep in mind when placing your Ninja blender into your dishwasher is to use only warm water without any soap or bleach added.
This way, even though there will be considerable vibrations, it won’t be damaged by the dishwasher’s water jets or any soap residues.
When you remove your blender from the machine afterward, try not to turn it on before everything has dried out fully so you don’t burn out the motor.
Next, let’s look at how to clean the Ninja blender using the handwashing method.
What Do I Need When Cleaning My Ninja Blender Manually?
- A cloth/sponge to clean the blender
- Dish soap cleanser
- Few drops of lemon juice
- Vinegar for extra cleaning boost
- Baking Soda
In order to clean your ninja blender effectively, you will need some cleaning equipment like a sponge or cloth, running water, and vinegar solution (1 part vinegar to 3 parts water).
You can also use lemon juice instead of vinegar for removing stains from your ninja blender.
Vinegar has acidic properties which help remove stains from most surfaces including glass, plastic, etc., without leaving any streaks behind.
It is recommended that you do not use harsh chemicals like bleach when cleaning your ninja blenders as these may leave harmful residues on their surface which may harm you when using it next time for preparing food items or drinks.
Also, avoid using abrasive cleaners such as scouring pads while cleaning your ninja blenders because they might scratch their surface making it difficult for the blade assembly to move smoothly inside the jar during the blending process resulting in poor performance of the machine over time due to friction between moving parts.
How To Clean Stuck-On Food From The Ninja Blender?
While Ninja blenders are designed to be easy to use, they can leave behind some tough-to-clean residue if you’re not careful.
If you notice that your blender is leaving behind pieces of food after using it, then there are a few things that you can try in order to get rid of this.
The first step in getting rid of stuck-on food in your blender jar is adding water and dish soap to the container and pulsing several times. The combination of these ingredients will help loosen up any stuck-on pieces so you’ll be able to rinse them off much more easily next time around.
A second method involves running warm water into the blender while it’s turned but plugged into an outlet then pulsing it several times to help lift any stuck-on food away.
A third option is to fill the jar with warm water and add some distilled white vinegar before pulsing. This method will give you an even greater chance of removing stubborn bits of food, yet it won’t damage your blender’s motor or components in the long run.
If none of these options work then you can also put some vegetable oil into the blender then pulse for 5 seconds while keeping power on until all remains are gone.
Then just wipe down the machine with a damp cloth and allow it to air dry which should leave no lingering odors or stains behind.
How To Remove Stubborn Stains From The Ninja Blender?
If you have stains on your blender jar from previous use, odds are they’ll be tough to remove especially if they’ve been there for a few days or weeks already.
Your first step towards removing these is to let the jar completely dry out then fill it halfway with warm water and add some dish soap.
After this, set it into the base of the machine then turn the unit on and pulse several times. This will break up any stuck-on food particles that may be causing those stubborn stains as well as give you a way to rinse away any residue for good!
You can also soak a sponge or washcloth in white vinegar and place it at the bottom of the blade container overnight.
Then give it a quick rinse in the morning and wipe away any remaining stains for good!
How To Clean Cloudy Ninja Blender?
If your Ninja blender has become cloudy and hard to see through then the problem could be because hard water minerals have built up and need to be removed.
To do this, you first need to fill up the blender jar with 3 parts vinegar and 1 part water.
After turning on the machine for 5 seconds, rinse everything out with warm water and wipe away any stains. If needed, do it again after filling it halfway with more white vinegar and powering it on again.
Here is the step by step guide on how to wash a Ninja blender –
Best Way To Clean Ninja Blender Parts
Do you know what’s better than a Ninja? A ninja that’s clean.
We all love our blenders, but let’s be honest – cleaning them can be a pain.
It takes time and patience to get those tough spots out of the blades and around the jar.
And who wants to spend their free time scrubbing away at dirty appliances when they could be doing something more fun?
But we’ve got your back! Here are some quick Ninja blender cleaning instructions for keeping your blender in tip-top shape so you can enjoy it for years to come.
Step1: Rinse
First, fill the container with warm water then add in some drops of dish detergent.
Next, adjust the setting to low power and turn on the blender for about one minute.
After this time has passed, pour out the mixture and rinse again with warm water before turning off the device.
Cleaning your ninja blender often will ensure that it is properly functioning when you need it most!
Step 2: Use Lemon To Remove Tough Stains
Here’s how to clean the inside of a Ninja blender –
1. Fill the blender with warm water and add a few drops of lemon juice.
2. Add soap to the mixture, then blend until it is sudsy.
3. Rinse out the blender with clean water.
Step 3: Disassemble The Blender
Disassembling the Ninja blender can be a daunting task, especially if you have never done it before.
It is important to follow the guidelines given in your manual for safety reasons and so that you don’t damage the blades on your jar.
For this reason, please unplug the blender from its power source before starting.
You should also make sure that any food particles are removed from the blades – we recommend using a dishwasher-safe sponge or cloth when wiping them down.
Here’s how to safely take apart your Ninja Blender: Unplug it first! Remove the lid and then remove all of the parts of your container; carefully lift off each blade and place them into a safe container.
Ninja blender lid is stuck? Here’s how to open the lid on the Ninja blender.
Step 4: Clean The Ninja Blender Pitcher
1. Put the blender jar in the dishwasher.
2. Fill it with soap and water, then turn on the dishwasher.
3. Add a little bit of white vinegar and baking soda to help with stains.
4. Let it soak for 10 minutes or more if needed.
5. Rinse thoroughly.
Step 5: Clean The Ninja Blender Blades
Part of the process of cleaning the blender should involve taking apart all removable parts and either wiping them down with soap or rinsing them off.
The blades have to be unscrewed in order to really get inside and clean out any gunk that’s in there.
One has to be very careful when they clean the Ninja blender blades, as they are sharp and it can lead to injury if one doesn’t know what they’re doing.
Make sure not to leave anything unattended while running water over the pieces, as this can cause splash back onto oneself and ruin clothing.
Related Post: How To Clean Ninja Blender Blades
Step 6: Clean Ninja Blender Rubber Gasket
To clean the Ninja blender rubber gasket, first, remove it from the jar and wash it under running water.
Don’t use soap as this will leave a residue that might negatively affect the rubber gasket’s performance. Rinse well and dry before reinstalling.
Step 7: Clean Ninja Blender Seal
The Ninja blender seal holds the jar in place. To clean this, simply wipe it down with a damp cloth and allow it to air dry.
Step 8: Clean Ninja Blender Handle
Sticky residue accumulates on the blender’s handle over time. To remove this, add some water and dish soap to a sponge and scrub away.
Step 9: Clean Ninja Blender Cups
In addition to the blender jar, the cups that come with a blender also need to be cleaned. To clean your Ninja’s cups or bottles, remove them from their plastic housing and wash in warm soapy water. Rinse well and allow them to air dry before placing them back on the device.
Step 1o: Clean The Ninja Blender Power Base
To properly clean the Ninja blender base, it is important to first soak a damp towel in soapy water.
Be very careful not to submerge the base of the blender in liquid because this can lead to damaging the sensitive parts of the unit.
Gently wipe off any spills or residue from around and corners with your hand until it’s been cleaned thoroughly enough.
Step 12: Let It Dry
Let the blender parts dry by placing them in a drying rack.
Please be patient while the parts dry.
Moisture can lead to condensation, which is the perfect environment for bacteria growth.
To avoid this, be sure to let them air-dry fully before putting it in your storage area – that way mold won’t grow and you’ll be able to clean it easily next time.
Step 13: Reassemble The Blender
Once you’ve dried the parts, reconnect them by following the instructions in your instruction manual.
When you are ready to use it, plug it in and turn it on!
How To Get Rid Of Unpleasant Odors From Ninja Blenders?
The best way to get rid of unpleasant odors from Ninja blenders is to regularly replace the rubber gasket. This is a part that absorbs all of the food particles and odors from inside the jar so it’s a good idea to know how to clean your ninja blender rubber gasket properly.
If you still notice a funky odor, then soak a sponge or washcloth in vinegar and place it at the bottom of the blender jar overnight.
In addition, periodically cleaning your blender blades can remove any tough stains on them as well as keep the whole machine smelling fresh.
You don’t have to spend more than five minutes or so wiping down surfaces with warm water or washing them in some soapy dishwater. It’s also important not to use too much soap as this can interfere with the blender’s performance.
How To Deep Clean All Parts Of Ninja Blender?
To deep clean all parts of the Ninja blender, you can use white vinegar or hydrogen peroxide along with some dish soap.
You can mix these in a container then soak the jars in this for about 3 hours before rinsing them off and allowing them to air dry.
After cleaning the machine as detailed above, allow it to run on high for 30 seconds.
As it does so, some food debris will accumulate at the bottom of the jar and around its blades so by running this cycle once more, you’ll be able to remove any stuck-on particles that were missed previously and everything will be clean and ready to go again!
Precautions And Tips
1. Unplug the blender from the power source before cleaning it.
2. Clean the base with a damp cloth or sponge, not soap and water.
3. Rinse thoroughly after washing to remove any soapy residue.
4. Use a toothbrush to clean hard-to-reach areas like blades and around the bottom of the jar.
5. You should never run hot water through your ninja blender because this may cause damage or even start a fire in some cases.
6. Also, do not put it under running water for too long because this could also damage its parts over time.
7. The blades of this machine are very sharp and they should be handled with extreme caution.
Conclusion – How To Clean The Ninja Blender
Cleaning your Ninja Blender is a piece of cake.
You’ll only need the right equipment and running water!
Once you’re done, just make sure to clean it thoroughly after every use so that you can maintain its top performance and avoid any potential health hazards for yourself and your family.
