The best way to lose weight is to consume fewer calories than you expend. A great way to do this is by juicing with a ninja blender. Ninja blender juicing recipes are not only delicious but they are also very nutritious. By incorporating these recipes into your diet, you can easily reduce your calorie intake and lose weight in a healthy way. So, if you are looking for a way to jumpstart your weight loss journey, ninja blender juicing recipes for weight loss are definitely the way to go!
Is Ninja Blender Good For Juicing?
Ninja Blenders are one of the most popular brands on the market, and for good reason. They’re powerful, versatile, and easy to use, making them a great choice for anyone who wants to make healthy smoothies or juices at home.
But what about juicing specifically? Is a Ninja Blender good for juicing fruits and vegetables? The answer is yes! Ninja Blenders are equipped with high-powered blades that can quickly break down tough ingredients like kale and carrots.
They also have multiple speed settings that allow you to adjust the blending speed to ensure that your juice is smooth and correctly blended. In addition, many Ninja Blenders come with specially designed juicing attachments that make it even easier to get the perfect consistency.
So if you’re looking for a blender that can handle juicing, a Ninja Blender is a great option.
The Benefits Of Juicing For Weight Loss
When it comes to weight loss, juicing can be a great tool to help you reach your goals. Because juicing allows you to consume a large amount of fruits and vegetables in a single serving, it’s a great way to increase your intake of essential nutrients and fiber.
Fiber is important for weight loss because it helps to keep you feeling full after eating, so you’re less likely to snack or overeat later on. In addition, the vitamins, minerals, and antioxidants found in fresh juices can help boost your metabolism and promote healthy weight loss.
So if you’re looking for a delicious and nutritious way to lose weight, try incorporating some ninja blender juicing recipes into your diet!
5 Delicious Ninja Blender Juicing Recipes For Weight Loss
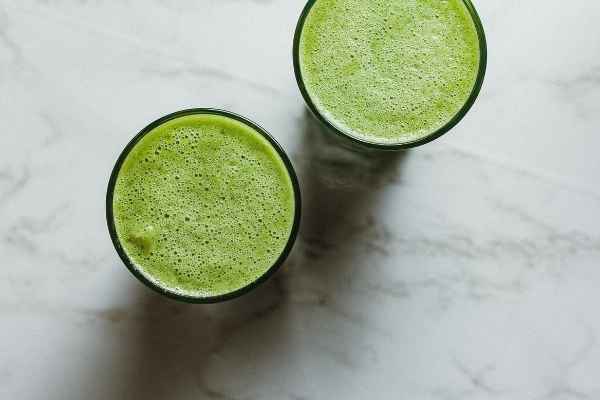
1. Green Juice
Ingredients:
- 2 cups of leafy greens (spinach, kale, or a mix)
- 1 cucumber
- 1 green apple
- 1 lemon
- 1 inch piece of ginger
- 1-2 cups of water (adjust to desired consistency)
Instructions:
- Preparation:
- Wash all the fruits and vegetables thoroughly to remove any dirt or pesticides.
- Peel the lemon and ginger.
- Core the apple and cut it into smaller pieces.
- Chop the cucumber into chunks.
- Tear the leafy greens into manageable pieces.
- Assembly:
- Place the leafy greens in the bottom of the blender. This ensures better blending.
- Add the chopped cucumber, apple pieces, peeled lemon, and peeled ginger on top of the greens.
- Liquid:
- Pour 1 cup of water into the blender initially. You can add more later to adjust the thickness of the juice.
- Blending:
- Put the lid on the blender securely.
- Start the blender on low speed and gradually increase to high speed.
- Blend for about 1-2 minutes or until all the ingredients are thoroughly combined.
- Consistency Check:
- Check the consistency of the juice. If it’s too thick, you can add more water in small increments and blend again until you achieve the desired thickness.
- Taste Test and Adjustments:
- Taste the juice and adjust the flavor if needed. If it’s too tart, you can add a touch of honey or a sweeter fruit. If it’s too bland, you can add a bit more lemon or ginger.
- Straining (optional):
- If you prefer a smoother juice, you can strain it through a fine mesh strainer or a nut milk bag. This step is optional and depends on personal preference.
- Serving:
- Pour the green juice into glasses or bottles.
- You can add ice cubes if you prefer your juice chilled.
- Storage:
- Green juice is best consumed immediately to retain maximum nutrients. However, if you need to store it, keep it in an airtight container in the refrigerator for up to 24-48 hours.
Remember that while green juices can be a great addition to a weight loss plan due to their nutrient content and low calorie density, they should be consumed as part of a balanced diet. It’s also important to consult with a healthcare professional before making significant changes to your diet, especially if you have any underlying health conditions.
2. Carrot-Apple Juice
Ingredients:
- 3-4 medium carrots
- 2 apples (any variety)
- 1 lemon
- 1 inch piece of ginger
- 1-2 cups of water (adjust to desired consistency)
Instructions:
- Preparation:
- Wash the carrots, apples, lemon, and ginger thoroughly.
- Peel the carrots and cut them into smaller pieces for easier blending.
- Core the apples and cut them into chunks.
- Peel the lemon and ginger.
- Assembly:
- Place the carrot pieces in the bottom of the blender.
- Add the chopped apple pieces, peeled lemon, and peeled ginger on top of the carrots.
- Liquid:
- Pour 1 cup of water into the blender initially. You can add more later to adjust the thickness of the juice.
- Blending:
- Put the lid on the blender securely.
- Start the blender on low speed and gradually increase to high speed.
- Blend for about 1-2 minutes or until the ingredients are well combined and the mixture is smooth.
- Consistency Check:
- Check the consistency of the juice. If it’s too thick, you can add more water in small increments and blend again until you achieve the desired thickness.
- Taste Test and Adjustments:
- Taste the juice and adjust the flavor if necessary. If it’s too tangy, you can add a touch of honey to balance the flavors.
- Straining (optional):
- If you prefer a smoother juice, you can strain it through a fine mesh strainer or a nut milk bag. This step is optional and depends on personal preference.
- Serving:
- Pour the carrot-apple juice into glasses or bottles.
- You can add ice cubes if you prefer your juice chilled.
- Storage:
- For maximum freshness and nutrients, it’s best to consume the juice immediately. However, if you need to store it, keep it in an airtight container in the refrigerator for up to 24-48 hours.
Remember that while carrot-apple juice can be a nutritious and refreshing option for weight loss, it’s important to incorporate a variety of foods and maintain a balanced diet for overall health. Always consult with a healthcare professional before making significant changes to your diet, especially if you have any underlying health conditions.
Related Post: Make Apple Juice In Ninja Blender
3. Beet Juice
Ingredients:
- 2 medium beets
- 1-2 carrots
- 1 apple (any variety)
- 1 lemon
- 1-2 cups of water (adjust to desired consistency)
Instructions:
- Preparation:
- Wash the beets, carrots, apple, and lemon thoroughly.
- Peel the beets, carrots, and lemon.
- Core the apple and cut it into chunks.
- Cut the peeled beets and carrots into smaller pieces for easier blending.
- Assembly:
- Place the beet and carrot pieces in the bottom of the blender.
- Add the chopped apple pieces and peeled lemon on top of the beets and carrots.
- Liquid:
- Pour 1 cup of water into the blender initially. You can add more later to adjust the thickness of the juice.
- Blending:
- Put the lid on the blender securely.
- Start the blender on low speed and gradually increase to high speed.
- Blend for about 1-2 minutes or until all the ingredients are well blended and the mixture is smooth.
- Consistency Check:
- Check the consistency of the juice. If it’s too thick, you can add more water in small increments and blend again until you achieve the desired thickness.
- Taste Test and Adjustments:
- Taste the juice and adjust the flavor as needed. If it’s too earthy, you can add a touch of sweetness by incorporating more apple or a small amount of honey.
- Straining (optional):
- If you prefer a smoother juice, you can strain it through a fine mesh strainer or a nut milk bag. This step is optional and depends on personal preference.
- Serving:
- Pour the beet juice into glasses or bottles.
- You can add ice cubes if you prefer your juice chilled.
- Storage:
- For optimal freshness and nutrient retention, consume the juice as soon as possible. If you need to store it, keep it in an airtight container in the refrigerator for up to 24-48 hours.
4. Cucumber-Lime Juice
Ingredients:
- 2 cucumbers
- 2 limes
- 1 green apple
- A handful of mint leaves (optional)
- 1-2 cups of water (adjust to desired consistency)
Instructions:
- Preparation:
- Wash the cucumbers, limes, apple, and mint leaves (if using) thoroughly.
- Cut the ends off the cucumbers and peel them if desired (peeling is optional).
- Core the apple and cut it into chunks.
- Cut one lime into quarters for juicing and the other lime into slices for garnish.
- Assembly:
- Place the cucumber pieces in the bottom of the blender.
- Add the chopped apple pieces and the juice of the quartered lime on top of the cucumbers.
- Mint Addition (optional):
- If using mint leaves, add them to the blender as well. Mint can add a refreshing flavor to the juice.
- Liquid:
- Pour 1 cup of water into the blender initially. You can adjust the water quantity later to achieve your desired juice consistency.
- Blending:
- Put the lid on the blender securely.
- Start the blender on low speed and gradually increase to high speed.
- Blend for about 1-2 minutes until all the ingredients are well blended and the mixture is smooth.
- Consistency Check:
- Check the consistency of the juice. If it’s too thick, you can add more water in small increments and blend again until it reaches the desired thickness.
- Taste Test and Adjustments:
- Taste the juice and adjust the flavor if needed. If it’s too tangy, you can add a touch of honey to balance the flavors.
- Straining (optional):
- Straining is usually not necessary for cucumber-lime juice, as the ingredients tend to blend well. However, you can strain it if you prefer a smoother texture.
- Serving:
- Pour the cucumber-lime juice into glasses.
- Add lime slices as garnish for extra visual appeal.
- Storage:
- Freshly made juice is best consumed immediately to retain maximum nutrients. If you need to store it, keep it in an airtight container in the refrigerator for up to 24 hours.
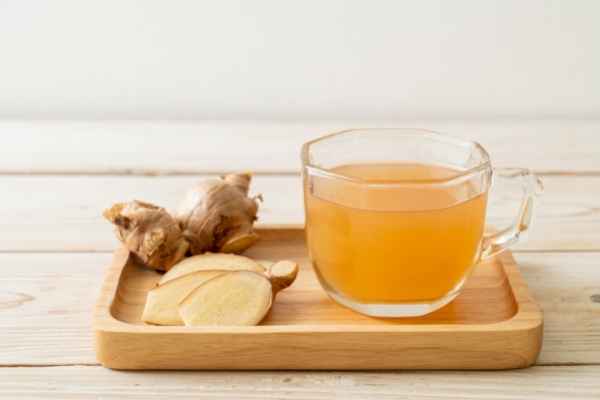
5. Tropical Turmeric Juice
Certainly, here’s a step-by-step guide for making Tropical Turmeric Juice in a Ninja blender that can be beneficial for weight loss:
Ingredients:
- 1 cup pineapple chunks (fresh or frozen)
- 1 orange, peeled and segmented
- 1 banana
- 1 teaspoon turmeric powder or a small piece of fresh turmeric root (about 1 inch)
- 1/2 teaspoon ginger (freshly grated or powdered)
- 1-2 cups of water (adjust to desired consistency)
Instructions:
- Preparation:
- If using fresh turmeric root, peel and chop it into small pieces.
- Peel and segment the orange.
- Peel the banana and cut it into chunks.
- Assembly:
- Place the pineapple chunks, orange segments, banana chunks, and chopped turmeric (or turmeric powder) in the blender.
- Turmeric and Ginger Addition:
- Add the ginger, either freshly grated or in powdered form, to the blender. Turmeric and ginger add flavor and potential health benefits to the juice.
- Liquid:
- Pour 1 cup of water into the blender initially. You can adjust the water quantity later to achieve your desired juice consistency.
- Blending:
- Put the lid on the blender securely.
- Start the blender on low speed and gradually increase to high speed.
- Blend for about 1-2 minutes until all the ingredients are well blended and the mixture is smooth.
- Consistency Check:
- Check the consistency of the juice. If it’s too thick, you can add more water in small increments and blend again until it reaches the desired thickness.
- Taste Test and Adjustments:
- Taste the juice and adjust the flavor if needed. If you prefer it sweeter, you can add a touch of honey or more ripe banana.
- Serving:
- Pour the tropical turmeric juice into glasses.
- Storage:
- Freshly made juice is best consumed immediately for optimal flavor and nutrient content. If you need to store it, keep it in an airtight container in the refrigerator for up to 24 hours.
Turmeric has potential health benefits due to its active compound curcumin, but it’s important to consume it in moderation. If you have any medical conditions or are taking medications, consult with a healthcare professional before adding large amounts of turmeric to your diet.
Related Post: 10 Easy Ninja Blender Keto Recipes To Try Today
Which Is The Best Ninja Blender For Juicing?
Now that you know all about the benefits of juicing for weight loss, you might be wondering which is the best Ninja Blender for the job. While any Ninja Blender can make delicious and nutritious juices, there are a few models that stand out from the rest.
For example, the Ninja Professional Blender (BL660) is specially designed for making smooth and evenly blended juices. It features a 1100-watt base and comes with a 72-oz pitcher, making it perfect for large batches of juice.
If you’re looking for another option, the Ninja Nutri Ninja Blender (BL642) is a great choice. It has a powerful 1200-watt motor and comes with a 72-oz pitcher, making it perfect for smaller batches of juice.
No matter which model you choose, you can be sure that your Ninja Blender will make delicious and nutritious juices that are perfect for weight loss! Thanks for reading!
Tips for Successful Juicing
Now that you know some delicious recipes for weight loss, here are a few tips to help you make the most of your juicing journey:
1. Start Slow – If you’re new to juicing, it’s important to start slow and ease your way into it. Try incorporating one or two juices into your diet each week and gradually increase your intake as you become more comfortable with juicing.
2. Use A Variety of Fruits and Vegetables -To get the most benefit from juicing, be sure to use a variety of different fruits and vegetables in your recipes. This will help ensure that you’re getting a wide array of essential nutrients and fiber.
3. Drink Your Juice Right Away – It’s important to drink your juice as soon as possible after making it. This will help preserve the nutrients and ensure that you’re getting the most benefit from your juicing efforts.
4. Store Juices Properly – If you need to store your juices for later, be sure to do so properly. Juices should be stored in an airtight container in the refrigerator and consumed within 24-48 hours for best results.
5. Listen To Your Body – Last but not least, it’s important to listen to your body when you’re juicing. If you start to feel sick or experience any negative side effects, stop juicing and consult a healthcare professional.
By following these tips, you’ll be well on your way to success with juicing for weight loss! Thanks for reading and best of luck on your journey.
Final Thoughts On Ninja Blender Juicing Recipes For Weight Loss
Juicing is a great way to boost your weight loss efforts. And with a Ninja Blender, you can make delicious and nutritious juices right at home! So if you’re looking for some recipes to get started, be sure to check out the ones above. Thanks for reading and good luck on your juicing journey!