Using the Ninja Blender in your kitchen can yield more than just smoothies, as it can also aid in making homemade bread. By utilizing the blender to create bread dough, you can minimize the need for flour on your countertop and hands, saving you valuable time in the kneading process.
If a Ninja Blender is not available to you, alternatives such as an electric mixer or the traditional method of manually adding flour and water can be used instead.
Can You Make Bread Dough With A Ninja Blender?
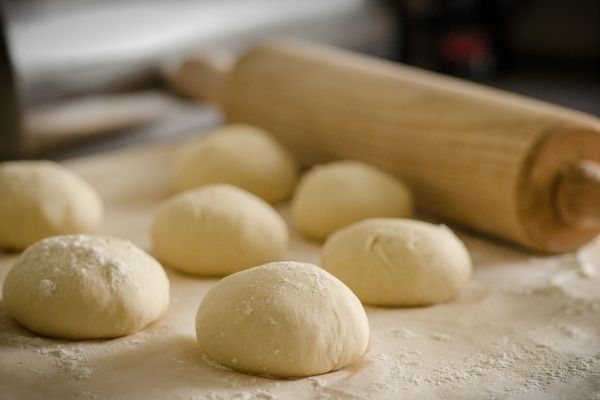
Crafting bread dough is an easy feat with the use of a Ninja blender, granted that the correct tools and ingredients are at hand. The Ninja dough blade attachment incorporates a sharp metal blade that can efficiently chop and mix the necessary components. Its ability to merge the bread dough together in mere minutes means that you can save time and energy!
Moreover, the dough feature of the Ninja blender is not limited to just bread, but can also be utilized for pizza dough or pasta. Unlike an electric mixer that may leave lumps and bumps in the mixture, the Ninja blender’s unique blade design ensures that the ingredients are blended together into a smooth consistency.
Using The Ninja Dough Blade Attachment
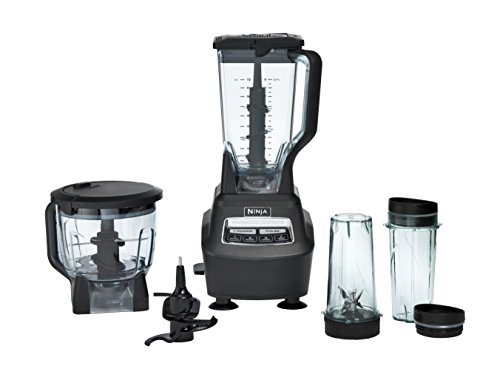
The Ninja dough blade attachment is part of many Ninja models so before buying a blender you should check to see if it comes with this blade.
If not, you can always buy one separately and they range in price depending on the model. It has a strong 80-ounce torque motor that easily mixes bread dough, kneads pizza dough, or makes homemade pasta!

How To Use The Ninja Blender For Bread Dough: What You Need
- 2 cups of warm water
- 1 package of yeast (our recipe used active dry yeast)
- 3.5-4 cups of flour (we did half all-purpose and half whole wheat for this experiment!)
- 1 teaspoon of salt (if you are using salted butter, decrease this to 1/2 teaspoon)Â
- Optional: if your bread dough doesn’t come out perfect the first time, add in some garlic powder or other seasonings before putting it into the oven to bake!
Buy The Best Ninja Blender For Bread Dough
How To Make Bread Dough With A Ninja Blender: What You Need To Know
It’s time to figure out how to make your dough with the Ninja Blender, which I’ve done ever since buying a Ninja blender.
If you’re ready to learn this effective method for making smooth dough for bread using only the Ninja Blender and other ingredients required for bread-making, keep reading to discover how.
-
- To prepare dough with your Ninja Blender, start by placing a package of active dry yeast in the blender.
- Add 2 cups of flour to the mix.
- One teaspoon of salt and one teaspoon of sugar should also be added.
- Add about 2/3 cups of warm water.
- Using a quarter cup of olive oil, mix it in.
- Place the blender lid on and then twist it into place.
- Attach the blender bowl to the motor base by placing it on top of the motor base.
- To keep your motor base secure to the countertop, make sure the lever is locked down.
- Press the power button.
- Press the dough button on the blender.
- Ninja blender will form a nice dough just within 30 seconds.
How To Clean The Ninja Blender After Making Bread Dough
To clean the Ninja blender, you will want to make sure that it is turned off and unplugged.
The easiest way would probably be to just remove all of the components from inside of it.
Fill up a large bowl with warm water and put in a little bit of dish soap.
Put everything into the bowl and let it sit for 20-30 minutes before taking them out one by one and scrubbing each piece down with a sponge or rag.
Rinse away all of the soap and dry each piece on some towels before putting it back together again!
This should be sufficient enough to get rid of any residual bread dough or other ingredients that might have been left behind!
Here’s how to operate a Ninja blender for things other than dough.
Troubleshooting Common Dough-Making Issues
Making bread dough in a Ninja Blender can be a rewarding experience, but like any culinary endeavor, it may come with a few challenges. Here are some common issues that may arise during the dough-making process and practical solutions to overcome them:
- Sticky Dough:
- Cause: Dough can become sticky due to excessive moisture or humidity.
- Solution: If your dough is too sticky, add small amounts of flour gradually until it reaches the desired consistency. Avoid adding too much flour at once, as it can make the dough too dry.
- Dry Dough:
- Cause: Insufficient liquid can result in dry and crumbly dough.
- Solution: Incorporate additional liquid, such as water or milk, little by little, until the dough becomes smooth and elastic. Be cautious not to add too much liquid, as it can make the dough too wet.
- Uneven Blending:
- Cause: Sometimes, the ingredients may not mix evenly, leaving clumps in the dough.
- Solution: Pause the blending process and use a spatula to scrape down the sides of the blender container. This helps ensure all ingredients are evenly distributed. Continue blending until the dough is uniform in texture.
- Over-Kneaded Dough:
- Cause: Over-kneading can lead to tough and dense bread.
- Solution: Monitor the dough closely while blending and kneading. Once the dough forms a smooth, elastic ball, stop the blending process to avoid overworking the gluten. A well-kneaded dough should be soft and slightly sticky to the touch.
- Under-Kneaded Dough:
- Cause: Under-kneaded dough may result in a loaf that doesn’t rise properly and has a dense texture.
- Solution: Continue kneading the dough for a bit longer to develop the gluten fully. Aim for a smooth, stretchy consistency to ensure the bread rises well during proofing.
- Incorporating Add-ins:
- Cause: When adding ingredients like seeds, nuts, or dried fruits to the dough, they may not blend uniformly.
- Solution: After the initial blending and kneading, remove the dough from the blender container and knead in the add-ins by hand on a floured surface. This ensures even distribution and prevents over-processing the add-ins.
By being mindful of these common dough-making issues and following the suggested solutions, you can create exceptional bread dough using your Ninja Blender. Don’t be discouraged by any challenges you encounter; experimenting and practicing will lead to better and more consistent results over time. Happy baking!
Special Considerations and Variations
Making bread dough in a Ninja Blender opens up a world of possibilities for creating unique and delicious loaves. Here are some special considerations and variations to explore in your dough-making journey:
- Different Types of Bread: Experiment with various types of bread, such as whole wheat, sourdough, rye, or artisanal loaves. Each type of bread may require adjustments in ingredients or blending times to achieve the desired texture and flavor.
- Gluten-Free Options: For those with gluten sensitivities or celiac disease, try gluten-free flours like rice flour, almond flour, or tapioca flour. Blend the dough carefully to ensure it reaches the right consistency without over-mixing.
- Herbs and Spices: Add a burst of flavor to your bread by incorporating herbs and spices into the dough. Rosemary, thyme, garlic, cinnamon, or nutmeg are just a few options to consider. Experiment with different combinations to create unique taste profiles.
- Seeds and Nuts: Introduce texture and nutrition by adding seeds (sesame, flax, poppy) or nuts (walnuts, almonds, sunflower seeds) to the dough. Blend them in with the dough or knead them in by hand for an even distribution.
- Cheese and Dried Fruits: Elevate your bread’s taste by incorporating shredded cheese, such as cheddar or parmesan, or dried fruits like cranberries, apricots, or raisins. The Ninja Blender’s pulsing feature is handy for blending these ingredients evenly.
- Sweet and Savory Blends: Play with the balance of sweetness and savory notes in your bread dough. For sweet bread, consider using honey, maple syrup, or molasses. For a savory twist, experiment with garlic, onion powder, or herbs like oregano and basil.
- Vegan and Plant-Based Options: Create vegan-friendly bread by substituting traditional ingredients with plant-based alternatives. Use plant-based milk, vegan butter, or coconut oil to achieve the desired taste and texture.
- Incorporating Filled Centers: For a surprise inside your bread, add a filling such as chocolate chips, cream cheese, or jam. Roll out the dough, spread the filling, and then fold the dough before blending.
- Bread Shapes and Sizes: Use different molds or shaping techniques to create bread in various shapes and sizes. From traditional loaf pans to round boules or baguettes, the possibilities are endless.
- Temperature and Rising Times: The Ninja Blender’s powerful blades can generate some heat during blending, affecting yeast activation. Adjust water temperature or rising times accordingly to ensure proper fermentation.
Tips for Better Bread Dough Results
- Measure Ingredients Accurately: Use precise measurements for flour, water, yeast, and other ingredients. Even small variations can significantly impact the dough’s texture and consistency.
- Start with Small Batches: If you’re new to bread-making in a blender, begin with smaller batches to familiarize yourself with the process and ensure even blending.
- Scrape Down Sides Regularly: Stop the blender and scrape down the sides of the container with a spatula as needed. This ensures all ingredients are thoroughly mixed, resulting in a consistent dough.
- Monitor Dough Texture: Observe the dough’s consistency while blending. Aim for a soft and slightly sticky dough, which is ideal for optimal rising and baking.
- Avoid Over-Blending: Over-blending can lead to overdeveloped gluten, resulting in a dense and tough loaf. Stop blending as soon as the dough comes together and appears smooth.
- Knead for Proper Gluten Development: Once blended, knead the dough by hand on a floured surface to develop gluten fully. This step enhances the dough’s elasticity and rise.
- Adjust Liquid and Flour as Needed: Depending on the humidity and the flour’s moisture content, you may need to adjust the liquid or flour amount slightly to achieve the desired dough consistency.
- Use the Right Blade and Speed Setting: Ensure you are using the appropriate blade for dough-making in your Ninja Blender. Opt for lower to medium speeds during blending and kneading to prevent overworking the dough.
- Properly Proof the Dough: Allow the dough to rise in a warm, draft-free area until it doubles in size. Cover the dough with a damp cloth or plastic wrap to retain moisture during the proofing process.
- Preheat the Oven: Make sure your oven is preheated to the correct temperature before placing the dough inside for baking. A well-heated oven ensures consistent baking results.
- Experiment and Adapt: Feel free to experiment with different flours, flavorings, and add-ins to create your signature bread. Keep track of your adjustments to refine your recipe over time.
- Practice Makes Perfect: Don’t get discouraged if your first attempt isn’t flawless. Like any skill, bread-making improves with practice. Embrace the learning process and celebrate your progress.
Frequently Asked Questions About Ninja Blender For Making Bread Dough
What If I Don’t Have A Ninja Blender?
In the absence of a Ninja blender, there are a couple of alternatives you could explore. One option is to use an electric mixer, or alternatively, the conventional method of manually adding flour and water beforehand. In cases where the former options are not feasible, adding more water to the dough and letting it sit for a longer period can also be a useful hack.
Is It Bad If The Bread Dough Has Clumps Of Flour Still In It?
Avoid meddling with your dough as it will eventually rise into one uniform sphere within 15 to 20 minutes of being left alone. As long as all the ingredients are fully blended together and there are no pockets of dry unblended flour remaining, your dough will turn out fine.
It’s crucial to ensure that your mixture is not overly runny and can maintain its shape independently when poured out onto the countertop.
What If I Accidentally Leave It In For Too Long And The Oven Turns Up Too Hot?
To avoid overcooking or burning, it’s best to remove the bread dough as soon as it’s ready. If you find that the interior is still undercooked, consider lowering the temperature and prolonging the baking time in the future.
If the dough is already in the midst of cooking, check that the oven is turned off before returning it for an additional 10 to 20 minutes.
Related Posts:
Making Bread Dough In Ninja Blender – Wrap Up
You can now recreate your own bakery’s bread at home with a Ninja Blender.
With this method, you don’t even need to knead the dough by hand or use a mixer.
This allows you to make the dough in less time and effort.
If you do not have a Ninja blender, it may be worth investing in one if you plan on continuing making bread at home frequently.
Are you interested in making bread dough in a Ninja blender? Go ahead, buy the Ninja Mega Kitchen System.